
To customize a baseball cap for a brand, start with the people who will wear it and the setting in which they will use it. Then decide on the crown construction, fabric and color, brim, closure, and branding. Record those choices in a specification, review a physical sample, and approve the final details before bulk production.
The order matters: a logo that looks good in a flat drawing may sit differently on a curved crown, and a closure choice changes the fit you need to approve. This guide takes you from an initial concept to a cap that a manufacturer can quote and sample.
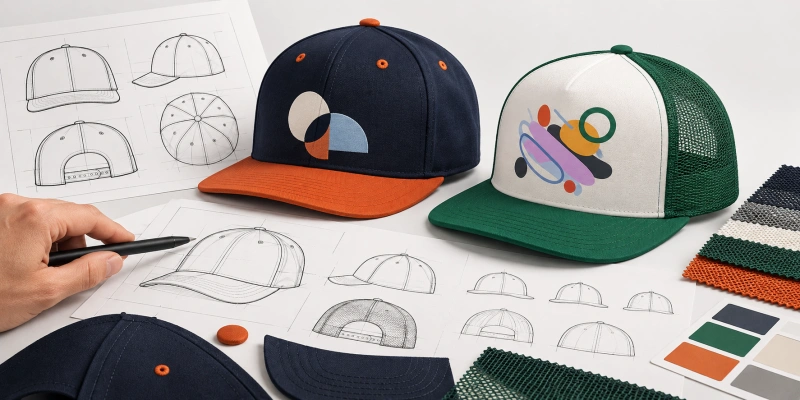
What Do You Need to Decide Before Customizing a Baseball Cap?
Before discussing a quotation, write down the main decisions. You can leave an option open for the supplier to review, but mark it as “to confirm” instead of letting it disappear from the brief.
| Decision | What to Record |
| Purpose and wearer | Retail, team, event or uniform; target wearer and expected use |
| Shape and fit | Panel layout, structured or unstructured front, crown profile, size range |
| Materials and appearance | Fabric reference, desired feel, color references and any contrast details |
| Brim and back | Brim shape and underside; closure type and fit expectation |
| Branding | Artwork, physical size, position and preferred decoration effect |
| Finishing | Inside labels, hangtags, packaging and carton assortment |
| Order | Quantity by style, size and color; destination and required date |
These fields interact. A front seam can interrupt a small wordmark; fabric and front support affect how decoration sits; a fixed-size cap needs a different fit plan from an adjustable one. Treat the list as a working specification, then use the sample to confirm the combination.
Step 1: Define the End Use, Wearer, and Price Position
Start with a sentence that describes the program: “A relaxed cap for a small retail collection,” or “A repeatable uniform cap with a visible front logo.” Include the sales channel, wearer, season, expected level of finish, and target price position. This gives every later choice a reason.
For retail, consider what will make the cap recognizable on a shelf or product page, including silhouette, inside branding, and packaging. For an event or promotional run, a readable logo and a fit that works across the intended group may matter more. A team program may need agreed color and decoration placement across several sizes or reorder periods.
Outdoor use calls for a discussion about weight, ventilation and care; do not infer water resistance, UV protection or quick drying from a fiber name.
If the brief contains competing goals, rank them. A soft, broken-in crown and a large raised front mark may require compromise or a sample comparison. Decide which detail is essential before you pay for artwork development or a physical sample. For a broader survey of cap families, start with the types of baseball hats.
Step 2: Choose the Cap Construction and Shape
Describe the shape in three separate dimensions: panel layout, front structure, and crown profile. A six-panel cap is not automatically high-profile or structured; a five-panel cap is not automatically low-profile. The pattern, materials, and front support determine the finished form. If you have a reference cap, photographs from the front, side, and back—ideally worn—are more useful than a style name alone.
Choose the Panel Layout
A five-panel pattern can offer a different front seam arrangement from a typical six-panel crown. Many six-panel designs place a seam at the front center. If the logo crosses that area, ask to see the proposed placement on the actual pattern. A five-panel label does not guarantee one uninterrupted decoration surface, so confirm the exact front construction. The 5-panel vs 6-panel hat comparison covers the construction in greater detail.
Decide How Much Front Support You Want
A supported front usually retains a more defined silhouette when the cap is set down. A softer, unstructured front follows the wearer’s head more closely. Neither choice decides comfort, breathability or embroidery quality by itself; fabric, pattern, support, and decoration all contribute. Compare the shape with your actual artwork and target fit. The structured vs unstructured hat guide can help you narrow that decision.
Set the Crown Profile and Fit Target
Low, mid, and high describe the intended silhouette, but suppliers may use the labels differently. Specify a reference shape and ask which measurements and pattern produce it. Look at the front-panel height, depth when worn, side view, and distance from the mark to the brim.
A taller crown can change the visual space for a logo, but it does not establish an exact usable decoration area. See the low crown vs high crown comparison when profile is central to the design.
Finish this step by identifying the intended wearer and whether you need adjustable, fitted or multiple sizes. Confirm the size range and fit on a physical cap; a one-size description cannot prove the fit for every wearer.
Step 3: Select Fabric and Color for the End Use
Choose the material by the result you want to inspect, rather than by a fiber name alone. Cotton twill is a familiar starting point for a classic woven look; a washed fabric may suit a softer, lived-in direction; corduroy or denim can make texture a visible part of a fashion design.
Lightweight synthetic fabrics may be worth sampling for a different hand or weight. Each of these can vary by weave, weight, finish, and backing, so request a material swatch or an actual cap before approving the look.
Ask three questions together: Does the fabric support the desired crown shape? Does the proposed decoration sit cleanly on that fabric? Will the finished feel suit the wearer and market? A textured or washed surface may affect the appearance of small lettering.
If your program has a performance requirement, specify the test and the finished-product claim you need; do not equate polyester or nylon with proven quick-dry or water-resistant performance. The baseball cap materials guide explains the components beyond the outer shell.
For color, provide a physical reference when possible and state whether the target is a close visual match or a specified color standard. Ask what is achievable in the chosen fabric and order, then approve a swatch and finished sample under consistent light.
A screen image, color name, or Pantone number by itself does not establish a dyed-fabric match. Record contrast underbrim, eyelet, thread, and closure colors as separate decisions if they are visible in the final design.
Step 4: Decide the Brim and Closure

A curved brim can give a familiar everyday profile, while a flat or lightly shaped brim may suit some merchandise and streetwear directions. Specify the target curve, projection, width, underside color, and visible stitching if these affect the product.
Then check the finished brim on the sample from the front and side. A flat mockup will not show its actual curve, stiffness, or relationship to the crown. Use the baseball cap brim guide for the terminology and construction details.
Choose the rear closure according to fit and appearance, not a category label. A snap closure creates visible hardware and adjustment increments. A fabric strap and buckle give a different finish and adjustment feel. Hook-and-loop or webbing may suit particular programs, but the strap material, hardware, and fit must be checked on the selected cap.
If you need a fitted style or several size bands, decide that now rather than leaving size to the last sample review. Closure placement can also limit a rear logo or label.
Ask the manufacturer to confirm the proposed brim and closure combination for the particular pattern. Record the approved back view as well as the front view; buyers often approve a front mockup and discover too late that the rear hardware changes the intended appearance.
Step 5: Choose the Logo Method, Size, and Placement
Begin with the artwork at the size it will appear on the cap. A design with thin text, tight gaps and several small colors poses a different problem from a bold single-color emblem. Mark the desired location on a front, side, or back view, and include dimensions in a stated unit.
The designer’s file should be checked against the actual front-panel shape and the seam, brim, eyelet, and closure positions. The baseball cap logo design guide goes further into artwork and placement.
Flat embroidery may suit a stitched mark whose lines remain legible at the approved size. Raised puff embroidery needs a design that can retain its shape and must be evaluated with the front support, lettering, and stitch coverage. A separate patch can change the border, texture, and attachment effect; a print or transfer is another possibility for compatible artwork and materials.
None of these methods work equally well on every fabric or crown. Ask for a decoration trial or finished sample if small detail, a textured fabric, or a seam makes the result uncertain. See flat embroidery vs 3D puff and woven vs embroidered patches for method-specific decisions.
A center-front seam on many six-panel patterns deserves special attention. It may change how small letters or a patch edge appears, but it does not make every center-front logo impossible. Request an actual-size mockup on the chosen pattern, then approve the mark on a finished cap. For a logo-led range, the embroidered baseball caps page shows the commercial decoration options; keep the final method and placement in your own specification.
Step 6: Add Private-Label and Packaging Details

Look beyond the front logo. Inside brand, size, care, and content labels may need separate wording and positions. You may also want branded seam tape or a sweatband detail, a hangtag, barcode or retail insert. These choices affect where information sits and how a finished cap is presented.
List each item, its artwork, material or finish preference, dimensions, position and language requirements; ask the supplier to confirm which details can be made for the selected construction and quantity.
Check the legal labeling requirements for each destination market with your own compliance adviser. Do not copy origin, fiber, or care wording from a sample whose composition or production arrangement differs from your order.
For shipping, specify whether caps need individual bags, inserts, size stickers, or a carton breakdown by color and size. Confirm how the approved crown and brim shape will be protected in packing. Leave packaging choices in the brief even if the final format is still under review.
Step 7: Prepare a Production-Ready Specification
A supplier can discuss an idea from a picture, but a usable quotation and sample require a common version of the design. Put the following fields in one document and identify anything still open. Attach reference images as references, and distinguish “match this detail” from “inspiration only.”
- Project: end use, wearer, target market, expected quality and price position, destination, and required date.
- Construction: reference cap, panel pattern, structure, crown profile, target measurements, fit and size range.
- Materials and colors: shell fabric and finish, lining or front support where relevant, color references, contrast details and approved swatch status.
- Brim and closure: shape, curve and underside; closure type, color, hardware and adjustment or size requirement.
- Decoration: original artwork file, actual logo dimensions, colors, method to evaluate, placements on front/side/back views and seam clearance.
- Finishing: label wording and artwork, care/content/origin review, sweatband or tape details, hangtag and packaging requirements.
- Order: estimated and final quantities by style, color and size; packing assortment and delivery destination.
Version the file and give each new sample or revised artwork a date and identifier. A brief reading “navy six-panel cap, logo on front” still leaves the shade, crown height, seam treatment, logo size and back closure to chance. If you do not have a formal tech pack, a clear table, annotated images, and a reference cap can be enough to start a useful discussion; ask your manufacturer which file formats, measurements, and artwork information it needs.
Once the core decisions are set, review the custom baseball caps page for the available project options and send the specification for review.
Step 8: Review the Physical Sample
A rendering is helpful for direction, but the finished sample shows the pattern, materials, and decoration together. Review it on and off the intended wearer. If the sample differs from the specification, mark the change clearly and request an updated sample or documented approval before treating it as the bulk reference.
| Check | Question for the Buyer |
| Shape and fit | Does the crown match the reference from the front, side and back? Does the cap sit at the intended depth on target wearers? |
| Construction | Are panels symmetrical, seams aligned, and the front support consistent with the approved look? |
| Fabric and color | Do the hand, texture and visible shades match the approved references under consistent light? |
| Brim and closure | Are the curve, projection and underside correct? Does the rear adjust or fit as specified? |
| Logo and finish | Is the mark legible at size, correctly positioned and clean around seams? Are stitches or edges acceptable? |
| Inside and packing | Are labels, wording, sweatband, hangtag, bag and carton presentation as agreed? |
Photograph the sample from fixed views and measure details that matter to the design, such as crown height, circumference or logo offset, using agreed tolerances if the order requires them. Do not approve the shape from a single front image. If a logo or fabric changes after sampling, evaluate whether the change needs another physical check.
The quality and compliance overview describes the broader inspection context; your signed sample and specification remain the practical approval references for your project.
Step 9: Freeze the Approved Specs Before Bulk Production
After the sample is approved, issue one final specification that identifies the accepted sample version, artwork, materials, colors, measurements, size and color breakdown, decoration placement, labels, and packaging. Record each exception explicitly. If a later material or decoration substitution is proposed, request a documented review rather than letting an earlier approval stand for a different cap.
Confirm who signs off the final sample and how changes will be communicated. Also agree on the order-specific MOQ, sample costs, production schedule, and any required inspections with the supplier; those are project terms, not universal properties of a hat style. Once the decisions are frozen, the how baseball caps are made article explains the factory workflow that follows approval.
If this is your first collection, our guide to starting a hat business places that sample approval within the wider budget, pricing, and launch plan.
Common Custom Baseball Cap Mistakes to Avoid
- Sending a logo without specifying the cap shape. Give a reference silhouette, panel layout, structure, and fit target before judging the branding.
- Assuming five-panel, six-panel, structured, and low-profile are mutually exclusive product categories. Record each construction attribute separately.
- Approving artwork at screen size. Check real dimensions, seam position, and legibility on the finished sample.
- Choosing fabric by fiber alone. Check the weight, weave, finish, support, and decoration together.
- Forgetting the back and inside. A closure, label, or hangtag can change the visible presentation and quotation.
- Treating a digital mockup as a bulk-production reference. Approve a physical sample and a dated, final specification.
FAQs
Do I Need a Tech Pack to Make a Custom Baseball Cap?
A formal tech pack helps, but you can start with an annotated reference cap or images, artwork at the intended size, the key construction choices, and estimated quantities. Put uncertain details on a “to confirm” list and ask what your manufacturer needs to quote and sample the selected design.
Can a Logo Be Embroidered Across a Six-Panel Cap’s Center Seam?
Sometimes, but the result depends on the pattern, artwork, stitch method, and intended size. A center seam can interrupt small details or affect alignment. Ask for an actual-size placement review on the chosen cap and approve the finished sample before bulk production.
Should I Approve a Physical Sample Before Bulk Production?
Yes, for a new custom design, a physical sample lets you judge fit, shape, fabric, color, and decoration as one product. Document any corrections and approve the final version and corresponding specification. If a later change affects these details, decide whether it calls for another sample.
What Is the Difference Between Choosing a Cap Style and Choosing a Logo Method?
Cap style describes the crown, front support, profile, brim, and fit. Logo method determines how artwork is reproduced on that construction. Decide the style first, then test the method and placement with the selected fabric and pattern.
Ready to Turn Your Specification Into a Sample?
Bring your reference cap or images, artwork, quantity by color, and target fit and finish details into one brief. Compare the proposed sample with that brief, record changes, and approve the final version before bulk production. When you are ready to discuss a project, see HENGXING’s custom baseball caps options and send your specifications for a quotation and sample discussion.