
To clean a snapback hat, read its care label and check the fabric, crown support, visor, plastic closure, and logo before adding water. Remove loose dirt, test a mild compatible cleaner in a hidden area, and spot clean with a soft cloth. Wipe away residue and air dry with the crown supported. Hand wash the whole hat only when its finished construction and care instructions allow it.
A snapback gets its name from the adjustable closure at the back. That closure does not tell you whether the crown is high or low, structured or soft, or whether the brim is flat or curved. Those details change how you should clean the cap. A fabric that tolerates water can still be attached to a sensitive front support or patch.
What Should You Check Before Cleaning a Snapback?
Set the cap on a clean surface and inspect it inside and out. If the label is missing or unclear, keep water localized until you can confirm what the finished hat can tolerate. Do not assume that a successful test on the outer fabric approves full immersion.
| Part | What to identify | Why it matters |
| Care information | Washing, drying and professional-care instructions | Instructions for the finished cap take priority over a general method. |
| Shell fabric | Cotton, polyester blend, wool, suede, coatings or mixed panels | Color, texture and response to water or rubbing can differ. |
| Crown | Reinforced front, soft front, foam or other internal support | Pressure and sustained wetting can change the intended profile. |
| Visor | Flat or curved shape; insert and layered construction if known | Protect the original geometry; an unknown insert needs caution. |
| Closure and sweatband | Plastic snaps, seams, printed labels, buildup and odor | Clean the band selectively; dry the closure and inner layers fully. |
| Decoration | Flat or raised embroidery, print, woven, PVC or leather patch | Stitches, surfaces, backing and attachment methods need different handling. |
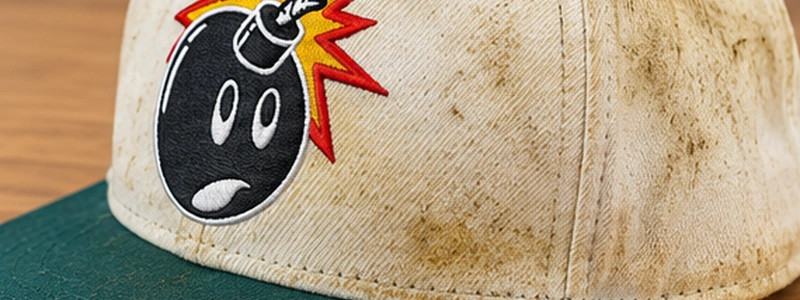
HENGXING has confirmed that its regular snapback visor inserts use HDPE or ABS plastic rather than cardboard. That removes the specific cardboard-softening concern for those regular styles, but it does not establish that every finished HENGXING cap can be soaked or machine washed. Other brands, older caps, and specialty constructions may use different inserts. Crown reinforcement and decoration still matter.
If the shell has a suede finish, leather detail, or delicate wool construction, use the material-specific care instructions or ask a qualified cleaner before wetting it. A plastic visor insert does not make those surfaces water-safe. See the hat materials guide for the wider material choices and the structured versus unstructured hats guide for front support terminology.
How to Spot Clean a Snapback Hat
For surface dirt and a lightly soiled sweatband, spot cleaning targets the dirty area without soaking the visor or front panel. Gather a soft brush, two clean light-colored cloths, a towel, and a mild cleaner suitable for the cap. Dilute the cleaner as directed, and dampen the cloth rather than the hat. If the care label rules out wet cleaning or the finish is delicate, follow its specific instructions instead.
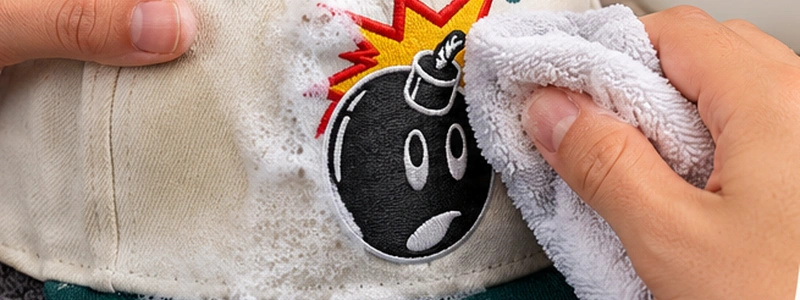
1. Remove Loose Dirt
Brush or wipe dry dust from the panels, seams, and visor edge. Work around raised stitching and patch edges so the brush does not catch them. On a nap or textured fabric, follow its surface direction.
2. Test a Hidden Area
Test the diluted cleaner on a hidden section. Blot with a light-colored cloth and check for dye transfer, a water ring, texture change, or a lifting logo. Let the test spot dry before cleaning the visible area.
3. Clean One Area at a Time
Blot or wipe the soiled fabric and sweatband with short, light strokes. Support the front panel from inside instead of pressing it flat. Work around embroidery and patch edges, and avoid wetting an unknown backing.
4. Remove Cleaner Residue
Wipe the treated area with a second cloth lightly dampened with clean water. Repeat until you remove the cleaner without spreading water across the rest of the cap.
5. Blot and Restore the Intended Shape
Blot damp areas with a clean towel. Do not wring the crown or twist the visor. Leave the flat or curved brim in its original shape.
6. Air Dry Completely
Support the crown as it air-dries, without stretching the sweatband. Check that the band and inner front are dry before wearing or storing the cap.
If you mainly need a general cap-washing framework, the baseball cap washing guide covers other closure types and constructions. A snapback needs the extra closure and component checks described here.
How to Hand Wash a Snapback Hat?
You can hand wash the whole cap only if its care instructions and finished construction allow it. The shell fabric, front support, visor, closure, and logo all matter. If the label calls for spot cleaning, or you cannot confirm how a patch, bonded logo, or inner support responds to water, use the method above.
For a cap approved for hand washing, prepare a mild cleaner according to its directions. Clean the sweatband first, then gently clean the washable panels while supporting the crown and visor. Wet only what the care instructions allow; do not soak the cap unless they expressly permit it. Avoid scrubbing the logo. Remove cleaner as directed, blot excess moisture, and return the crown and brim to their original shape. Let the cap air dry.
Stop if dye transfers, a patch edge lifts, the front support softens, or the finish changes. Remove the cleaner gently. A wool or suede cap may need different care from a cotton twill cap; there is no soak time or water temperature that suits every snapback.
Can You Wash a Snapback Hat in a Washing Machine?
Only if the care instructions for that finished cap expressly permit it. A plastic snap and an HDPE or ABS visor insert do not make the whole hat machine washable. A washer can compress the crown, wet its inner support, and rub against embroidery or patches.
If machine washing is approved, follow the cap’s stated cycle, water temperature, and drying instructions. Keep heavy garments from crushing it. A laundry bag may reduce snagging, but it cannot protect a fabric, backing, or patch that should not be washed. Without approval, spot clean or use an allowed hand-wash method. Skip the dishwasher unless the cap maker specifically permits it.
How to Clean the Sweatband, Sweat and Odor
The sweatband often gets dirtier than the outer crown. Brush off dry debris, then wipe the band with a tested, lightly damp cloth and a suitable mild cleaner. Work gently where it meets the front panel. Wipe away the cleaner with a second cloth and let the band and inner front dry fully.
For a fresh light mark, one controlled pass may be enough. An old ring may include body oil, salts, transferred dye, or a changed finish and may not disappear completely. Do not move straight to bleach, a strong solvent, or a homemade mixture because an outer panel looks durable. The separate guide to removing sweat stains from baseball caps covers persistent marks in more detail.
If a musty smell remains after the band is clean and dry, check for moisture in the inner front and seams. Fragrance will only cover the smell. For visible mold, a damaged lining, or a valuable specialty finish, seek care advice from the maker or a qualified cleaner.
How to Clean Logos and Patches
Identify the logo material and how it is attached before cleaning near it. Follow the finished cap’s care label, and use light pressure around stitching, prints, and patch edges.
Flat and 3D Embroidery
Wipe around flat stitching with a soft cloth and minimal pressure, paying attention to the backing on the inside. Raised 3D embroidery sits above the panel, so avoid sweeping a brush across it or squeezing it against a hard surface. Do not pull a loose thread. If the backing stays damp, extend the drying time rather than applying concentrated heat. The flat embroidery and 3D puff comparison explains the construction differences.
PVC and Woven Patches
Wipe a PVC patch gently with a cleaner permitted for the finished cap; avoid strong solvents or high heat that may affect its surface or attachment. On a woven patch, avoid a stiff brush or sharp object that might snag fine yarns. If either patch is bonded rather than sewn, keep water from sitting at a lifting edge and stop if the bond changes. The woven versus embroidered patches guide helps identify the artwork construction.
Leather Patches and Printed Graphics
Leather can spot, stiffen, or change appearance when wet. Do not immerse a leather patch just because the shell fabric is washable; follow its care instructions or consult a qualified cleaner. For a printed or heat-applied graphic, test a hidden area, avoid rubbing a cracked print, and follow the cap’s drying instructions. The right method depends on the leather finish or print system.
How to Dry a Snapback Without Losing Its Shape
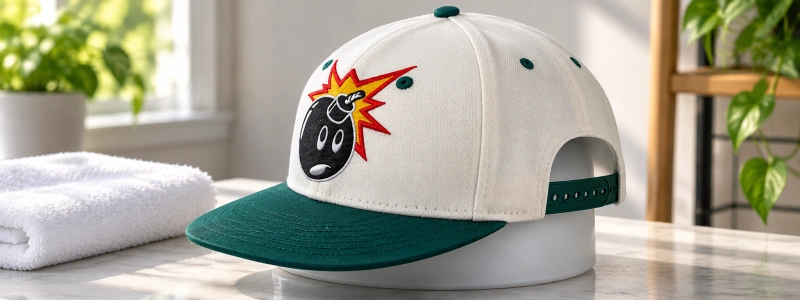
Blot first, then support the crown so the front returns to its intended profile. A loosely placed clean, colorfast towel or a smooth form near the cap’s natural head shape can help, provided it does not stretch the opening or mark the fabric. Keep the visor free of pressure and preserve its original flat or curved geometry. Do not try to change its curve as part of the cleaning process; the baseball cap brim guide covers brim construction separately.
Let air circulate through the sweatband, front support, and snap area. Open the closure if that helps the back dry, but do not force a brittle snap. Avoid a hot dryer, radiator, or hair dryer unless the care label permits it. The outer shell may feel dry while the inner layers remain damp.
Drying support helps preserve a sound cap; it will not rebuild a broken insert, detached backing, or deeply creased front. If the hat was already distorted, see how to reshape a baseball cap before trying a separate restoration method.
Common Mistakes That Can Damage a Snapback
- Choosing a wash method from the word “snapback” alone. The closure does not reveal the fabric, reinforcement, visor, or decoration.
- Scrubbing across raised embroidery, woven yarns, or a lifting patch edge. Work beside the decoration with a soft cloth.
- Soaking an unidentified leather detail, printed film, glued patch or inner support to treat a small spot.
- Using bleach, strong solvents, or concentrated heat without care approval for the complete cap.
- Twisting the visor, wringing the crown or forcing a flat brim into a curve while the hat is damp.
For Brands: Plan Care Instructions Before Production
If you order custom snapbacks, include the intended care method in your product brief. Specify whether the finished cap should be spot cleaned, hand washed or, if testing supports it, machine washed. Record the shell and sweatband fabrics, front support, visor insert, snap closure, logo attachment, and care-label wording. A fabric swatch alone cannot establish how to clean the decorated finished cap.
Review a finished sample with its actual logo and labels. If you intend to advertise washability, agree on a test method and acceptance criteria before making that claim. Recheck the care instructions when you change the fabric, backing, patch, or attachment.
Explore HENGXING’s custom snapback hats and discuss the care needs of your chosen fabric, crown, visor and logo while reviewing a finished sample.
FAQs
Can You Put a Snapback in the Washing Machine?
Only if its care label allows machine washing. A plastic snap or visor insert does not establish that the front support and logo can tolerate a wash cycle.
How Do You Clean Sweat From a Snapback?
Wipe the sweatband with a tested, lightly damp cloth and a suitable cleaner. Remove residue and dry the band and inner seam thoroughly. For a stubborn mark, see the dedicated sweat-stain guide above.
Can Washing Shrink a Snapback?
Fabric or a sweatband can change size under unsuitable cleaning conditions, but washing is not a reliable way to adjust fit. Follow the finished cap’s care instructions rather than trying to shrink it during cleaning.