
What Are PVC Patches Made Of?
Most flexible PVC patches are made from plastisol, a mixture of fine PVC resin particles dispersed in a liquid plasticizer, with pigments added for color. It flows into a shaped mold and becomes a flexible solid when heated. The formula affects the finished feel, and the mold forms the raised logo, recessed lines, and background.
“Rubber patch” is often used as a broad sales term, but it does not establish the actual polymer. Silicone, TPU, and flexible PVC are different materials and may call for different production and attachment methods. If material identity or a chemical requirement matters to your order, ask for the exact specification and supporting test documentation.
How Are PVC Patches Made? Step-by-Step Manufacturing Process
This is a common molded plastisol process, not a fixed recipe for every factory. The mold, dispensing method, heating sequence, and finishing may change with the design. The approved sample and production specification should settle those choices for your order.
Step 1. Prepare the Artwork and Patch Specifications
Production starts with a logo file and the intended finished size. The factory turns the artwork into a drawing that shows separate color areas, raised and recessed details, the border, and any sewing channel. The patch also has to fit the hat. A wide or thick design may sit poorly across a curved cap front or a crown seam.
A small letter may look clear on screen but close up when molded at hat-logo size. The drawing is therefore checked for legibility and fillable spaces before the metal mold is cut. Confirm the size, colors, relief, and attachment plan at this point. Changing the shape later may mean reworking or replacing the mold. The design section below explains what to send for that review.
Step 2. Create the PVC Patch Mold Using CNC Engraving
The approved drawing guides the machining of a metal mold, often with CNC equipment. The mold sets the patch outline, relief levels, boundaries between colors, and any planned sewing channel. Its surface also affects how sharply the finished letters and raised details appear.
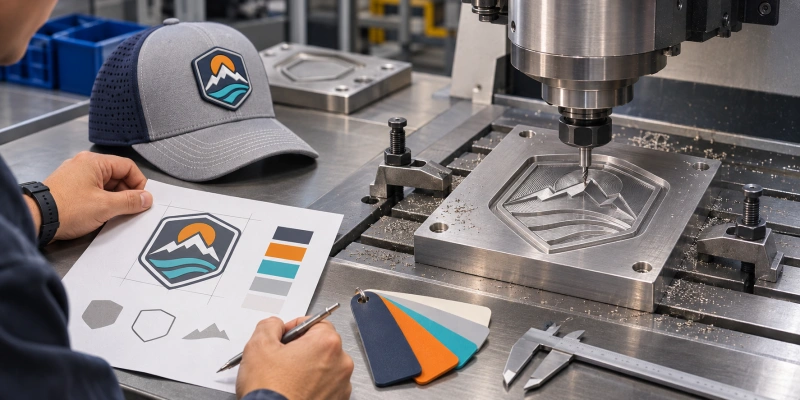
The cavities must be large enough to fill while keeping neighboring colors separate. Tiny enclosed spaces or crowded lettering can make that difficult. The mold is cleaned and checked before dispensing so machining debris does not mark the patch. If the patch needs a sewing channel, it belongs in the design and mold rather than being improvised after molding.
Step 3. Prepare and Match the PVC Colors
The required colors are mixed into a suitable plastisol system and compared with the approved references. A physical sample is useful because color on a monitor can differ from color on a molded surface. Finish, thickness, and lighting can also change how the finished patch looks.
The mixture must flow into small details without trapping avoidable air bubbles. Air introduced during mixing can leave pinholes in the molded surface. Agree on the color reference and acceptable variation for the finished patch; a Pantone number alone cannot guarantee an exact visual match on every material and finish.
Step 4. Dispense the PVC into the Mold in Layers
Colored plastisol is dispensed into the mold’s separate areas. Small foreground details may be placed before the larger background, although the order depends on how the mold forms the visible face. The operator or dispensing system has to fill narrow areas without leaving gaps or letting one color spill into another.
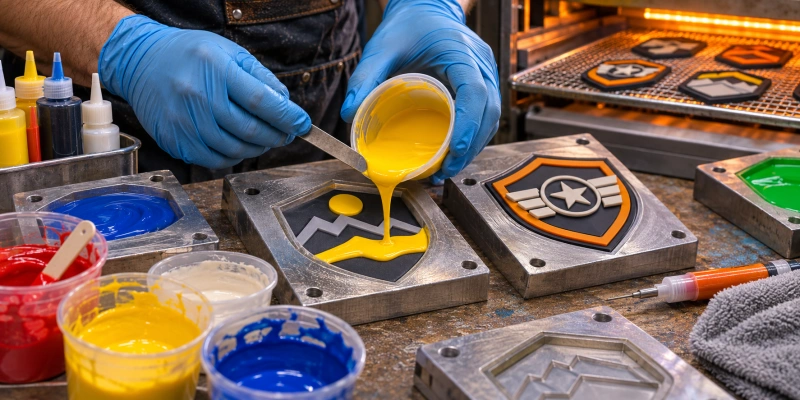
Some designs need a brief setting stage between colors, followed by a base layer that holds the patch together. The mold geometry determines the sequence, so there is no universal rule to fill the outline first. If a fine detail repeatedly blurs or fails to fill, the drawing or mold may need to change.
Step 5. Heat the PVC to Gel and Fuse the Layers
Heating turns the liquid plastisol into a formed patch. As the PVC particles absorb plasticizer, the material gels; further heating fuses it into a continuous flexible mass. With multiple colored deposits, an earlier layer may be set enough to hold its shape before the next is added. The whole patch still needs adequate final heating.
Too little heat can leave a weak or poorly formed patch; too much can damage its appearance or material. The right time and temperature depend on the formulation, mold, thickness, and equipment, so one setting cannot be prescribed for every order.
Step 6. Cool and Remove the Patch from the Mold
The formed patch is cooled enough to hold its shape before it is removed. Pulling it out too early or tugging at a fine detail can distort an edge or tear the design. The mold is then checked for residue before the next cycle.
The patch should keep its intended outline, relief, and color separation after removal. A flaw at this stage may come from the drawing, filling, or heating. Finding that cause is more useful than trimming away a visible symptom. Cooling and release methods differ by factory and mold.
Step 7. Trim the Edges and Add the Required Backing
Excess material along the edge is trimmed or finished to match the approved outline. The specified backing is then added if the design needs one. A sew-on patch needs a usable stitching border or channel; a removable patch needs a hook backing and a matching loop panel on the hat. Heat-activated adhesive is possible only when the backing and hat material suit that method.
This step prepares the patch for attachment; it does not attach it to the cap. Check the finished border and backing against the sample. A clean-looking edge is not enough if there is no room to stitch or the backing does not suit the chosen hat front.
Step 8. Inspect the Finished PVC Patches
Compare the finished patches with the approved design and sample. Check color boundaries, incomplete fills, bubbles, surface marks, small lettering, edges, and dimensions. If the patch will go on a hat, inspect its sewing channel or backing and test the chosen attachment on a representative cap.
Record the approved logo version, colors, size, relief, backing, and any agreed acceptance limits. Check the assembled hat as well: a patch that looks fine on a table can lift at a crown seam. Use the same approved sample for bulk production. For a wider review of the finished cap, see the custom hat sample approval checklist.
How to Design Custom PVC Patches for Manufacturing
Choose 2D or 3D Relief for the Logo
A 2D patch has fairly flat areas at distinct raised levels. A 3D patch uses more contoured relief. A simple logo with clear color blocks may read better in 2D; a mascot may benefit from 3D shaping. Judge either choice at the finished size. Deep relief can crowd small lettering or add bulk to a low-profile crown.
Send Artwork That Can Be Reviewed at Actual Size
Send an editable vector logo if available, finished patch dimensions, color references, hat style, placement, and preferred attachment. Indicate which parts should be raised or recessed. Simplify tiny type, tightly packed details, and photographic gradients where they cannot be molded clearly. Review a mold proof and a physical sample at the intended size.
HENGXING’s custom hat decoration options can also help you compare the patch with other logo treatments.
Can You Make PVC Patches at Home?
You can make a patch-like prototype at home with cut vinyl, resin, or 3D-printed TPU. These materials and methods produce different results from a molded PVC plastisol patch. A Cricut-style cutter, for instance, layers vinyl shapes; it does not form the relief in a metal mold. A resin or printed sample can show the approximate shape on a hat, but it may behave differently when attached.
For an early size check, place a paper mockup on the intended cap. Before committing to bulk production, assess a sample in the actual patch material and on the actual hat. Industrial plastisol processing calls for suitable equipment and controls; a household heating recipe is not a dependable way to reproduce it.
How to Attach PVC Patches to Hats
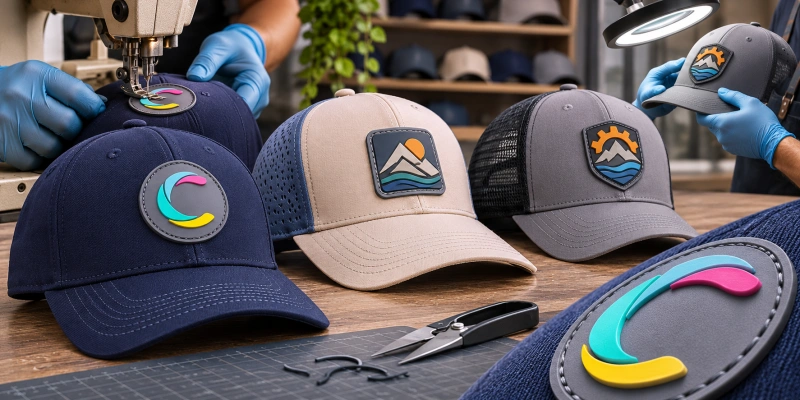
Choose the attachment method for the backing and hat front you will actually use. Sewing needs a planned border or channel and a stitch path that works on the panel. Heat application needs compatible adhesive and a press setup that does not damage the patch or distort the hat. A removable patch needs hook backing and a securely attached loop panel on the cap.
| Method | Suitable application | What to approve on the sample |
| Sew-on | Fabric or suitable foam fronts with a usable border | Stitch path, edge lift, crown shape, and seam clearance |
| Heat-applied | Compatible backing and a stable hat material | Adhesion, appearance and response to care |
| Hook-and-loop | Removable logos on hats with a loop panel | Panel size, hold, edge fit and placement |
A structured cap, foam-front trucker hat, and knit beanie respond differently to stitching, pressure, and heat. Check whether foam compresses, whether a curved or seamed crown lifts the patch edge, and whether knit fabric needs extra support. For custom trucker hats with logo patches, approve the attachment on the exact front panel you plan to order.
What Affects the Cost of Making PVC Patches?
A custom mold adds an initial setup cost. Larger patches use more material, while extra colors, fine details, deep relief, or difficult color boundaries may add production work or require changes to the design. Quantity affects how that setup cost is spread across the order. Backing, inspection requirements, and attachment to the hat add to the total decorated-cap cost.
Ask suppliers to quote the same design version, size, relief, backing, hat style, placement, and quantity. Check whether the price includes the mold, sample changes, and attachment to the cap. A patch-only unit price does not describe the cost of a finished branded hat.
How to Order Custom PVC Patch Hats
Send your logo artwork, proposed patch size, color references, preferred 2D or 3D effect, and hat style. Include a reference cap or front-panel material if you have one, along with the placement, quantity, intended market, and any material or testing requirements. If you are unsure about backing, say whether the logo should be permanent or removable so the supplier can assess it against the cap construction.
Ask for a design proof and an assembled hat sample before placing the bulk order. Confirm the finished color, relief, edge, placement, and attachment on that sample, then record the approved version. HENGXING can review your patch design alongside the cap construction and quote the finished hat. Request a project-specific quote with your artwork, hat style, quantity, and preferred attachment.