
To heat press a baseball cap, you need a compatible transfer, a supported front panel, and even contact with the press. The curved crown, front seam, and brim can get in the way. This guide walks you through the setup, application, and sample check before you press a larger batch.
Can You Heat Press Baseball Caps?
Yes, if the cap and transfer can handle the process. Check the cap’s fabric, coating, reinforcement, and trim against the transfer maker’s instructions; a care label alone does not establish heat compatibility. The entire design needs contact for the specified time. A seam or air gap can leave part of it underpressed, while heat or pressure can damage the brim or crown.
A cap press with a platen that fits the crown makes contact easier to control. A flat press may work for a small design when the panel is firmly supported, and the brim stays clear. If the cap has an unknown coating or heat-sensitive part, test a different blank or transfer before proceeding. For other ways to customize a baseball cap, see our guide.
What You Need to Heat Press a Baseball Cap?
Gather the cap, compatible transfer and its application instructions, press, fitted platen or firm support, lint roller, and ruler. Add heat-resistant tape, a cover, or a pad only if the transfer and equipment instructions allow it; each layer can change contact and heat transfer.
Choose a support that reaches the whole design area while keeping the brim clear. Remove shipping inserts, pull the sweatband out of the pressing area where possible, and smooth the front panel against the support.
For repeat orders, record the cap and transfer used, support, settings, and peel method from the approved sample. Test again if any of these change.
Choose the Right Transfer for the Cap
Start with the instructions for the exact transfer you plan to use. HTV, DTF, sublimation, and heat-applied patches have different application requirements.
| Transfer | Where It May Fit | Check Before Pressing |
| Heat transfer vinyl (HTV) | Cut lettering or simple graphics with a film finish | The exact film’s fabric compatibility, layers, cover, pressure, and hot, warm, or cold peel instructions |
| Direct-to-film (DTF) transfer | Detailed or multicolor artwork supplied as a finished transfer | Fabric compatibility, adhesive, pressure, peel stage and any finishing press in the supplier instructions |
| Sublimation | Compatible polyester fabric or a purpose-made coated blank | Panel suitability, ink and paper instructions, heat tolerance and prevention of paper movement |
| Heat-applied patch or emblem | A raised or textured logo on an approved cap | Backing and adhesive type, pad requirements and any instructions for crossing a seam |
A polyester label alone does not make a finished cap suitable for sublimation. Check the panel and the heat-sensitive parts around it. Ordinary cotton is not a standard sublimation substrate. An embroidered patch may be sewn on or heat applied, depending on its backing. Our woven vs embroidered patches comparison explains the visual difference between patch types.
A small, flexible design is usually easier to fit on a curved panel than a wide, stiff one. Measure the actual cap before finalizing artwork. See our baseball cap logo design guide for placement ideas.
How to Heat Press Baseball Caps: Step by Step
Follow the transfer and press instructions for the settings, cover layers, and peel stage in these steps.
1. Check the Cap and Transfer
Check the cap’s fabric, coating, reinforcement, mesh, foam, and trim. Confirm that the transfer suits the intended panel. Use a spare cap from the actual batch for the first test; polyester content alone does not prove that the finished cap can tolerate the required process.
2. Prepare a Clean Pressing Area
Remove packing inserts and lint from the front panel. Smooth the panel over the platen or form, keeping the sweatband and closure clear where possible. If the transfer calls for preheating, test that step on the sample cap. Stop if you see shine, marks, or a change in shape.
3. Support the Crown
Pull the front panel snugly over a fitted curved platen, or place a firm, heat-safe form inside the crown. Support the entire design area, including its top edge, and keep the brim clear of the hot platen. Smooth a soft crown without stretching it. A structured crown should keep its shape when you close the press.
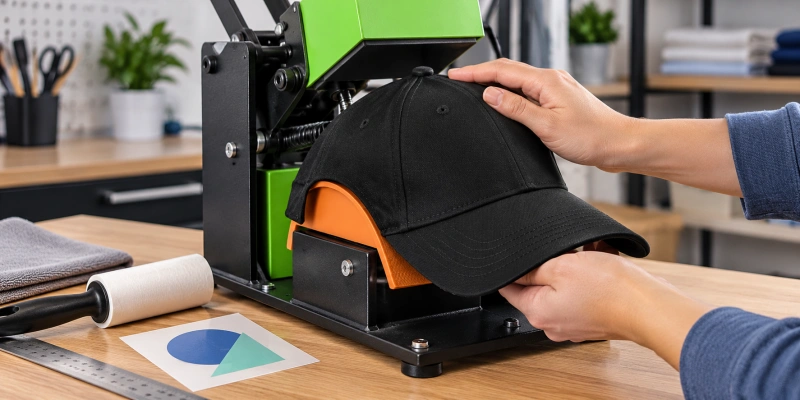
4. Place and Secure the Design
Check the design against the brim and panel edges, then measure its position. If a front seam interrupts contact, reduce or move the design unless the transfer maker approves a method for pressing across the seam. Secure the transfer without creasing its carrier.
5. Set and Verify the Press
Set the time, temperature, and pressure given for the transfer and compatible cap material. Once the press reaches the target temperature, check how it closes on the cap with the required cover or pad in place. A pressure display cannot show whether every edge touches the curved panel. If contact is uneven or the crown flattens, change the support or placement before pressing.
6. Press According to the Material Instructions
Apply the specified cover and press for the instructed cycle. Hold the cap steady as the press closes so the design does not slide. A handheld tool may require movement; a cap press holds the platen in place. Follow the method for the tool you are using, and keep hands clear of the hot surface.
7. Peel at the Specified Stage
Remove the carrier when the transfer instructions say to peel it: hot, warm, or cold. Add a finishing press only if those instructions require one.
8. Inspect the Sample Before Repeating It
After the instructed peel, inspect the edges, fine details, and seam area for gaps or lifting. Once the cap cools, check for wrinkles, color change, shine, cover marks, or distortion. If the sample fails, change one factor at a time—support, placement, transfer, or an allowed setting—and test again before pressing the rest of the batch.
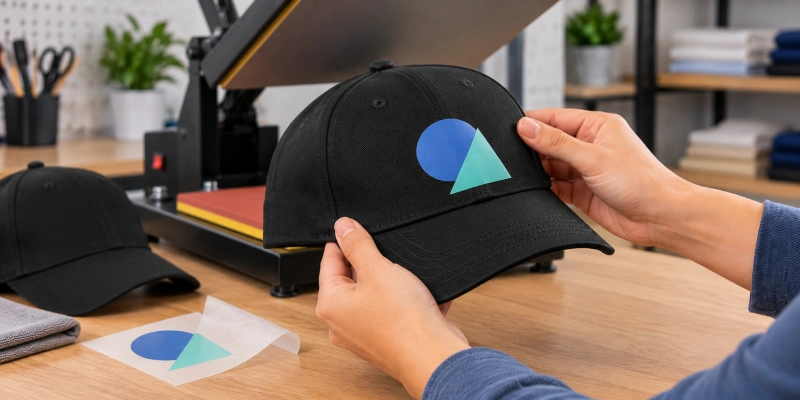
Heat Press Time, Temperature, and Pressure
No single time, temperature, or pressure works for every cap. Start with the current instructions for the exact transfer, then check that the cap and press can meet them. Two HTV products may need different settings and peel stages, even on the same fabric. Do not use one DTF supplier’s settings for another supplier’s transfer.
| Variable | What to Verify | What a Poor Match Can Cause |
| Temperature | Transfer specification, actual press setting and cap material tolerance | Weak bonding, shine, discoloration or distortion |
| Time | Supplier’s dwell time and any separate finishing cycle | Incomplete adhesion or excess heat exposure |
| Pressure | Supplier requirement and contact across the entire curved graphic | Lifted edges, a seam gap or a crushed crown |
| Peel | Product-specific hot, warm or cold instruction | Film lifting or damaged detail during removal |
If an edge lifts, check support and material compatibility before changing the settings. Cotton, polyester, and blends can have different finishes. A dyed polyester cap may show press marks or dye migration into some transfers. For help choosing a blank, see baseball cap materials and cotton vs polyester hats. Test the exact combination before production.
How to Heat Press a Baseball Cap With a Flat Press?
A flat press may work for a small design if you can support the panel and keep the brim out of the way. Test contact carefully: a curved cap rarely sits flat on its own.
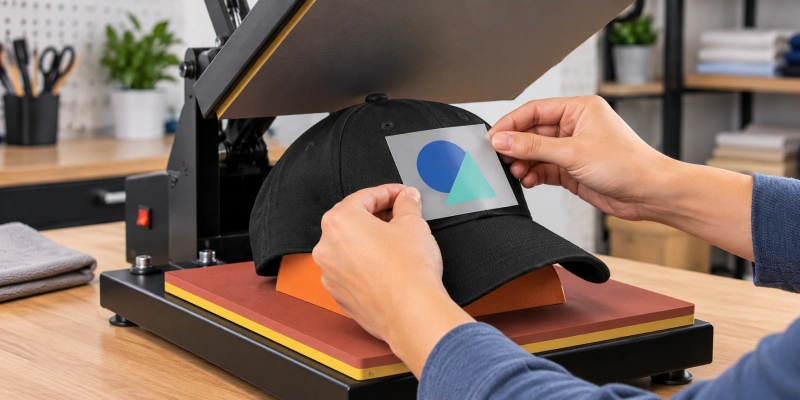
Place the target panel under an accessible part of the upper platen, away from the hinge, with the brim clear. Put a firm, heat-safe support inside the crown and smooth the panel over it. Keep the sweatband, closure, and thick seams outside the contact area when possible.
Before heating the sample, check how the press closes on the supported cap. If the panel slips, the seam creates a gap, or the brim blocks closure, change the setup or decoration location.
Once the setup gives full contact, press a sample using the transfer’s time, temperature, pressure and peel instructions. A pressing pillow may help some shapes, but it also changes the pressure and heat reaching the transfer; use one only when the instructions allow it. For a wide design or repeat run, a fitted cap platen is usually easier to control.
Cap Construction Problems to Watch
Front seam. A five-panel cap typically has an uninterrupted front panel; many six-panel caps have a seam down the center. The raised seam can leave parts of a transfer underpressed. Some systems allow seam application, but you need to test the exact combination. Compare 5 panel vs 6 panel hats when planning a wide front logo.
Crown support. A structured front has reinforcement that can flatten under pressure. An unstructured front can bunch as you load it. Keep either panel smooth and check that it retains its shape. Our structured vs unstructured hats guide explains the construction difference.
Profile and print area. A low crown may leave too little room for a tall design. A taller crown may give you more space, but the platen must still fit. Measure the finished cap rather than relying on a generic placement chart.
Mesh, foam, and trim. Do not treat a trucker cap’s mesh back or foam front like plain cotton twill. Mesh gives little continuous support, and foam, coatings, eyelets, plastic adjusters or brim inserts may react poorly to heat and pressure.
Keep the application within the supplier-approved area and test the exact blank. If an existing logo or embroidery occupies the pressing zone, move the transfer rather than pressing over raised decoration without an approved method.
Heat Press vs Embroidery for Baseball Caps
Heat pressing attaches a transfer or emblem to the cap. Some transfers handle full-color artwork and fine detail. Embroidery builds the design with stitches and gives it a different texture. Compare samples on the same cap; appearance and durability depend on the materials and how each design is made and cared for.
A seam and curved crown affect both methods. Heat transfers need even contact and a suitable adhesive. Embroidery needs appropriate digitizing, backing, and hooping. For the stitching process, see how to embroider a baseball cap. For stitched branding options, see custom embroidered baseball caps.
For a larger order, approve a sample on the actual cap style before production.
Common Heat Press Problems and Fixes
| What You See | Likely Area to Check | Next Action |
| An edge lifts after peeling | Peel stage, support beneath that edge, pressure and compatibility | Re-press only if the supplier allows it; otherwise correct contact and test a fresh transfer |
| A gap follows the center seam | Raised seam interrupts contact | Move or reduce the graphic, or use a transfer and pad combination approved for seam application |
| The image wrinkles or shifts | Loose carrier, oversized artwork, or movement on the curve | Smooth the panel, trim excess carrier if permitted and secure the graphic before pressing |
| A shiny mark or color change appears | Excess heat, pressure, cover imprint or heat-sensitive finish | Stop the run; test an approved lower-heat transfer or another cap |
| The crown or brim loses shape | Platen mismatch, brim contact or excessive pressure | Clear the brim, fit the support and reduce pressure only within the transfer’s approved range |
| A sublimation image ghosts | Paper moved while hot or the blank was unsuitable | Secure the paper as instructed and confirm that the panel suits sublimation |
If only one edge lifts, check support and alignment first. If the whole graphic fails, check transfer compatibility and settings. If the approved process still fails on a sample, change the cap, transfer, or decoration method.
FAQs
Can You Heat Press a 100% Polyester Baseball Cap?
Yes, in some cases. Check the transfer’s compatibility and test the finished cap, including its brim, finish, and reinforcement. A 100% polyester label does not give you a safe temperature for every component.
What Time and Temperature Should I Use for a Polyester Baseball Cap?
Use the instructions for your exact transfer, then test those settings on the finished cap with your press and cover. There is no general setting for all polyester caps.
Can I Use a Regular Flat Heat Press on a Baseball Cap?
Yes, for some small designs. Support the panel, keep the brim clear, and test one cap. If the entire design cannot touch the platen evenly, use another setup.
Can I Press Over the Front Seam of a Six-Panel Cap?
Only if your transfer system supports it and a test confirms even contact. The raised seam can leave gaps. Moving or reducing the design may be simpler.
Why Is My Transfer Peeling Off the Hat?
Check peel timing, transfer compatibility, and contact beneath the lifted area. Verify the press settings. Re-press only if the transfer supplier permits it; otherwise fix the setup and test a fresh transfer.
Is Heat Pressing Better Than Embroidery for a Logo?
Neither is always better. A transfer can suit detailed full-color artwork; embroidery gives a stitched look. Compare samples on the same cap for detail, feel, placement, and care requirements.
Ready to Apply the Design?
Test the chosen transfer on the actual cap. Peel at the instructed stage, inspect the cooled cap, then record the setup before running the batch. For a custom order, share your cap material, structure, and artwork when discussing custom baseball caps, and confirm the decoration method for your design.