
Direct embroidery stitches directly into the cap. A patch is made separately, then attached to it. If you want a simple stitched mark that feels part of the hat, direct embroidery is a sensible starting point. If you want a defined badge, another material, or a detail that is hard to sew onto a curved crown, compare patch samples. Neither method is automatically cheaper or longer-lasting. The right choice depends on your artwork, cap construction, attachment method, and order quantity.
For a bulk order, start with the same logo on the cap style you intend to buy. Compare the actual size, front shape, edge finish, and feel while worn. A flat digital proof cannot show how a dense stitch area pulls a soft panel or how a stiff badge follows a crown. You can discuss both routes through HENGXING’s custom hat decoration options and approve a physical sample before production.
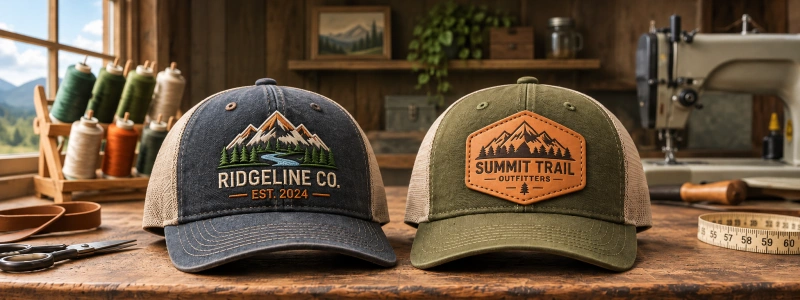
Direct Embroidery vs. a Hat Patch: What Changes?
With direct embroidery, a digitized stitch file guides the logo onto the cap panel. Thread choice, backing, stitch direction, and tension all affect the finished mark. Flat embroidery lies relatively close to the fabric. 3D puff uses a foam underlay to raise suitable bold parts of a design. In both cases, the cap panel is the surface being decorated; the design has no separate patch edge to attach.
A patch starts as an independent component. An embroidered patch carries stitched artwork on its own base. A woven patch forms the artwork in finer woven threads; a printed patch reproduces an image on a suitable patch material. Leather, synthetic, and PVC badges give other textures. Each still needs an approved way to join it to the hat.
“Embroidered patch” therefore describes the badge, not embroidery stitched directly into the crown. “Patch” does not mean “heat applied”: a badge may be sewn, heat applied with a compatible backing, or attached by another approved construction.
When requesting a quote, name the decoration method. For a patch, specify the badge material and how it should be attached. That distinction helps the supplier price and sample the finished cap correctly.
Embroidery vs Patch: Compare the Factors That Matter
Use the table to shortlist the options for your artwork and cap. Then judge them at the intended size on the actual front panel, especially if the crown is soft or curved.
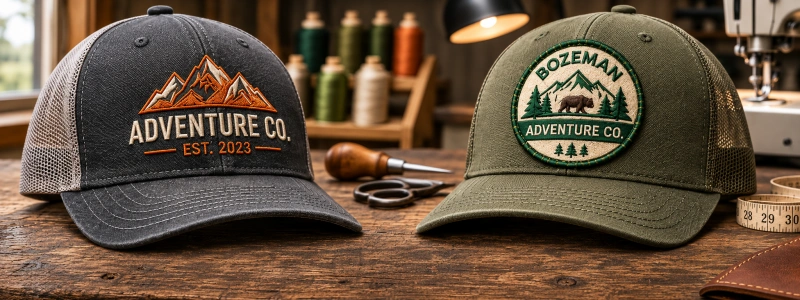
| Decision factor | Direct embroidery | Separate patch |
| Appearance | Stitches sit within the cap fabric; flat or raised effects depend on the artwork. | A visible border and independent material create a badge effect. |
| Fine detail | Legibility depends on stitch plan, letter size, fabric, and seam position. | Depends on patch material; woven or printed formats may retain certain fine features. |
| Cap shape | Dense stitches and tension can pull soft or curved panels. | Badge thickness, edge stiffness, and size affect how it follows the crown. |
| Attachment | No separate adhesive or patch edge; thread can still snag or break. | Sewn, heat-applied and removable constructions have different failure points. |
| Cost drivers | Digitizing, stitch count, colors, machine time and cap handling. | Patch material, setup, edge finish, production quantity and attachment. |
| Changes after sampling | A new logo size or placement may require a revised stitch file and sample. | A new badge shape, material or backing may require a revised component and attachment test. |
| Best first sample | Clean stitched identity or bold raised shapes on a suitable panel. | A defined badge, distinct material finish or artwork needing another reproduction method. |
The comparison is about a finished custom hat, not a patch in isolation. If you are comparing a woven badge with direct stitching, keep the cap body, logo artwork, and intended position consistent. Change one decoration choice at a time so you can see what actually caused the difference in appearance or feel.
Which Method Fits Your Logo?
Small Lettering and Fine Lines
Small letter openings, narrow gaps, and thin outlines deserve a check at finished size. For initial direct-embroidery artwork, use a minimum height of 6.4 mm for lowercase or serif lettering and 7.6 mm for uppercase or script lettering, with lines at least 1.2 mm wide. These figures help screen a design; typeface, stitch direction, fabric and seams still affect legibility. Review the exact wording on a decorated sample.
If lettering cannot be enlarged without losing the design, compare a woven or suitable printed badge. The edge, fabric, and attachment must also work at that size. An embroidered patch still relies on stitches and should not be treated as a universal fix for tiny text. If the wording is essential, have the supplier show you the actual-size badge and on-cap appearance before approving it.
Bold Lettering, Raised Marks and Color-Rich Art
Bold, open shapes are useful candidates for flat or 3D puff embroidery. A raised design needs room for the foam to be covered cleanly; small enclosed spaces and sharp corners may lose definition. If the raised effect matters to your brand, compare a sample with flat stitching rather than assuming that more height means a better logo. HENGXING’s baseball cap logo design guide gives further placement considerations without replacing an on-cap sample.
For gradients, many colors, or photographic elements, ask whether a printed patch can reproduce your design on a suitable material. Woven and embroidered badges have their own limits in thread color, texture, and edge treatment. A leather-look or PVC badge can add material character, but it will not reproduce every fine line equally. Specify whether color accuracy, tactile finish, or legibility matters most; that priority will guide the first sample.
How Do Cap Style and Attachment Change the Result?
A broad, stable front panel can carry a different decoration from a low, soft crown. On a five-panel cap with a continuous front face, the logo may avoid a center seam. A six-panel cap often has a front center seam that can interrupt small text, affect needle movement, or make a badge sit unevenly. Neither panel count alone guarantees a result. Check the real front shape, lining, fabric, and seam thickness.
On a custom dad hat, a heavy patch or dense stitch fill may change the relaxed drape. A small flat stitched mark or a flexible badge is a useful starting sample. On a custom trucker hat, identify whether the front is foam or woven fabric and keep the logo on a supported area rather than treating the mesh back as the same decoration surface. A custom snapback hat may offer a firmer, taller front, but its actual crown height and center seam still determine the usable layout.
Use these preliminary HENGXING logo areas, in centimeters, to lay out artwork for the listed cap profiles. Each width and height pair applies to a specific position. The usable area for your fabric and decoration still needs to be checked on the selected cap.
| Cap profile | Front width × height | Side width × height | Back width × height |
| High crown / broad-front trucker | 11.4–12.7 × 5.7–6.3 | 5.0–6.3 × 2.5–3.1 | 5.7–7.6 × 1.9–2.5 |
| Low-crown dad hat | 8.9–10.1 × 4.4–5.0 | 5.0 × 2.5 | 5.7 × 1.9 |
| Listed flat-brim snapback | 12.7 × 6.3–7.0 | 5.0–6.3 × 3.8 | 7.6 × 2.5 |
A sewn patch needs a border that can be stitched securely. Heat application depends on the backing, fabric, temperature, pressure, and access to the curved panel; foam, coatings, or heat-sensitive components may rule it out. Hook-and-loop works when you intend to change badges, and both mating parts have been approved. Specify the preferred attachment in your inquiry and check its edge and feel on the finished sample.
What Affects Cost, MOQ and Lead Time?
For direct embroidery, the price reflects the cap, digitizing, stitch work, color changes, and decorated positions. Dense fills or a difficult center seam can add machine time. A patch quote also includes the badge material, any setup, edge finish, and attachment. Quantity and colorways affect both routes. Compare the price of the finished cap under each specification, including sampling and setup, rather than a decoration charge alone.
The HENGXING catalog lists an MOQ of 50 pieces, sample time of 5–7 days, and production time of 20–35 days. Use these as planning figures when you inquire; the catalog does not call them working days or define the start of each period. Confirm the minimum and schedule for your cap, decoration, quantity, and colorways after the sample requirements are clear. Do not assume that a 50-piece order can be divided freely among styles or colors.
If your launch date is fixed, state it at the first request. Ask when sample development starts, what you must approve before bulk work begins, and whether a patch component has a separate production step. A fast digital mockup is useful for positioning, but it is not a substitute for the physical sample that establishes the look and construction of the bulk order.
Durability and Sample Checks Before Bulk Production
Direct stitching can develop loose threads, gaps, puckering, or poor coverage. On 3D puff work, check for exposed foam at the edges. For patches, look for lifting corners, uneven border stitching, misalignment or heat marks on sensitive fabric. Durability depends on the specific fabric, stitch plan or attachment, use and care; compare samples under conditions relevant to your product.
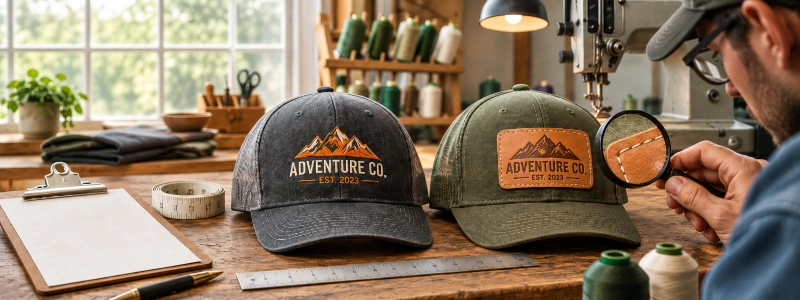
Review the logo from the front and side, both close enough to read and at normal viewing distance. Compare its dimensions with the approved drawing. The sample criteria give a typical ±2 mm tolerance for logo width and height, not permission to shift its position.
Where relevant, check visible seams against 7–9 stitches per inch and trim obvious loose thread ends to the specified 2–3 mm limit. Compare colors under D65 lighting. The stated ±0.5 cm circumference tolerance applies to closed-size caps; do not apply it to adjustable hats.
Check fill coverage, lettering, thread ends, panel shape, and backing on a directly embroidered sample. For a patch, inspect its entire edge, attachment, symmetry, and effect on the crown. Agree which checks apply to your specification and how the approved sample will be used to assess bulk production. If wash performance or adhesion is critical to your product, request a test on the actual cap and decoration combination.
Choose a Method and Request a Quote
The following options are starting points for sampling. Use your final artwork and chosen cap to make the decision.
| Your design or cap | Sample first | Check before approval |
| Simple, readable stitched logo | Flat direct embroidery | Lettering, thread color and front-panel puckering. |
| Bold raised front mark | 3D puff on a suitable supported front | Spacing, covered foam and crown shape. |
| Fine lettering or dense graphic detail | Woven or suitable printed patch | Actual-size legibility, border and attachment. |
| Soft low-crown cap | Small flat embroidery or flexible, lightweight patch | Drape, comfort and whether the front keeps its intended shape. |
| Logo near a six-panel center seam | Adjusted placement or a separately made patch | Seam thickness, symmetry and on-cap appearance. |
Send your logo source file and intended finished dimensions, then identify the hat style, panel construction, front fabric, preferred placement, quantities by style and color, target market, and required delivery date. If you have a reference cap, include front, side, and back views.
For a patch, specify the material or visual effect and ask the supplier to propose a suitable border and attachment. For direct stitching, state whether the mark should be flat or raised. If you are undecided, request two samples or a clear comparison using the same cap construction.
Your final approval should name the cap, fabric, logo size and position, thread or badge colors, attachment method, and approved physical sample. Then ask for the complete price, applicable MOQ, and production schedule for that specification. You can send these details through HENGXING’s custom hat inquiry form or explore the available custom baseball cap options before selecting a base style.
FAQs
Is an embroidered patch the same as direct embroidery?
No. The first is sewn into the cap; the second is an independently made badge attached afterward. If your quote simply says “embroidery,” ask whether it includes a separate patch and its attachment.
Are patches more durable than embroidery on hats?
Ask how the proposed patch is attached and what care instructions apply to that cap. If you expect frequent washing or outdoor use, request a test on the actual material and construction. A general claim about “patch durability” cannot tell you how your order will perform.
Which usually costs more for a bulk order?
Request two quotes using the same cap, logo size, and quantities. Include setup, sampling, and attachment in the patch version, and digitizing and stitch work in the direct version. That gives you a comparable finished-cap price.
Can you put a patch over the center seam of a six-panel hat?
Sometimes. The seam may create a ridge under the badge, so ask to see the exact six-panel cap with the proposed patch attached. If it does not lie evenly, try a smaller or more flexible badge, move the artwork, or use a different front panel.
Is a woven patch always better for tiny lettering?
It can be a better starting point for fine detail, but judge the exact words at finished size. If the letters still disappear, simplify the artwork or ask for a suitable printed badge. Do not approve a patch from an enlarged mockup alone.
Can you combine a front patch with side embroidery?
Yes. Mark both positions, their finished dimensions, and their colors on the same artwork sheet. Have the two decorations included in the sample and quote so the side logo is not treated as a later addition.
If you are comparing methods for a new collection, send one cap reference, the original logo artwork, and your intended quantities. HENGXING can review the decoration options and develop a sample for the configuration you want to buy. Send your artwork and request a quote.