
To clean a white baseball cap, begin with its care label and the entire cap, not just the white fabric you can see. Remove loose dust, test a compatible mild cleaner in a hidden area, and treat the visible marks first. Remove the cleaner, blot away moisture, and let the cap air dry in its intended shape. Expand to a fuller wash only if the finished cap’s instructions and construction allow it.
White fabric shows yellowing, body oils, colored smudges, and water marks readily. Yet a white shell may sit beside colored embroidery, a patch, a different sweatband, or a brim insert that should not be saturated. The best cleaning method is the least forceful one that improves the mark without putting those other parts at risk. “White” does not by itself mean bleach-safe, soak-safe, or machine washable.
Before You Clean: Check the Whole Cap
Read the finished cap’s care information. Check whether it allows wet cleaning and whether it names a particular drying or professional-care method. If the instructions are missing or unclear, look for details that make water or rubbing risky: a stiff or unknown brim insert, reinforced front panels, a bonded patch, heat-transfer print, leather trim, coating, or old, damaged stitching. Even the sweatband may carry a printed label or colored tape.
Examine white areas in daylight so you know which marks are on the surface and which may be a change in the material itself. Inspect the colored logo and stitching too. A cleaner can leave the white shell looking better while causing dye to move from embroidery onto the panel. Do not soak a brim whose insert you cannot identify; do not assume a cotton outer panel describes the whole cap.
If you need help checking the brim, crown support, sweatband, and decoration before a full wash, use the construction checklist in how to wash a baseball cap. A fragile or valuable cap with no reliable care instructions may be better handled by a qualified cleaner.
How to Clean a White Baseball Cap Step by Step?
Set out a dry, soft cloth or brush, two clean light-colored cloths, a dry towel, and a mild cleaner only if it is compatible with the cap’s care information and contact materials. If wet cleaning is permitted, use a small amount of cool water for a controlled treatment. These are starting materials, not a universal formula: follow a specific cap label if it gives different directions.
1. Remove Loose Dirt First
Before you wet a dirty white baseball cap, lift loose dust with a dry cloth or very soft brush. Pay attention to panel seams, the inner edge of the brim, and surface debris on the sweatband. A damp cloth can turn loose gray dirt into a larger smudge. Work around embroidery loops and patch edges rather than dragging the brush through them. If the white surface has a textured finish, test brushing in a hidden area as well.
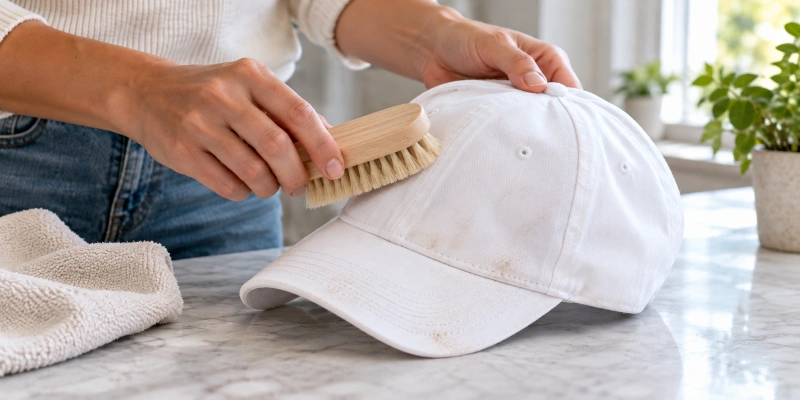
2. Test for Color Transfer and Finish Changes
Lightly dampen a hidden area with the proposed cleaning solution. Blot it with a clean, light-colored cloth; check for color on the cloth, darkening, a visible border, texture change, or a lifted patch edge. Let the test spot dry before deciding to continue.
On a cap with colored embroidery or trim, test cautiously near those components without wetting them heavily. If color moves or a finish changes, stop that treatment. A successful test on the white shell does not prove a brim insert or adhesive tolerates immersion.
3. Treat Visible Marks Before Washing the Whole Cap
Start with the mark that needs attention: a smudge on a panel, a dirty seam, or yellowing near the sweatband. Use a small amount of the tested cleaner on a soft cloth, then blot or make gentle, short passes. Change to a clean portion of cloth as soil lifts. Avoid pushing colored residue across the white fabric. Around a logo, clean toward a clean cloth area instead of sweeping moisture through colored thread onto the shell.
For an old yellow mark, work in a limited area and reassess after the first pass dries. Do not scrub harder to force an immediate white result. If the whole cap is soiled, the decision to clean a larger area comes from the label and the construction check, not from a wish to make its color look uniform. Keep an uncertain brim, bonded detail, or leather part out of the wet area.
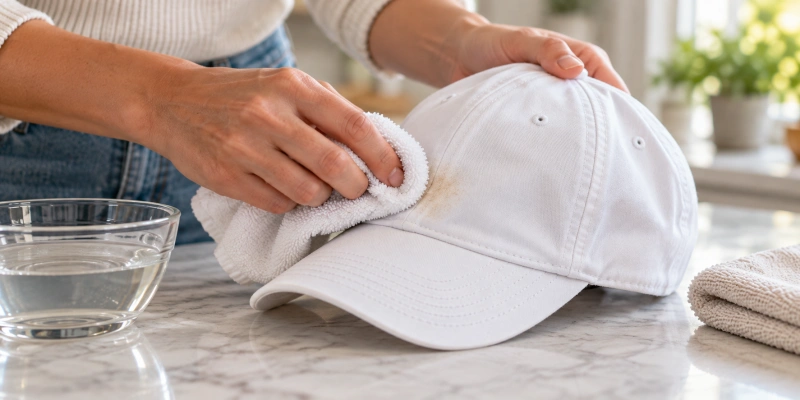
4. Remove Cleaner Thoroughly and Air Dry
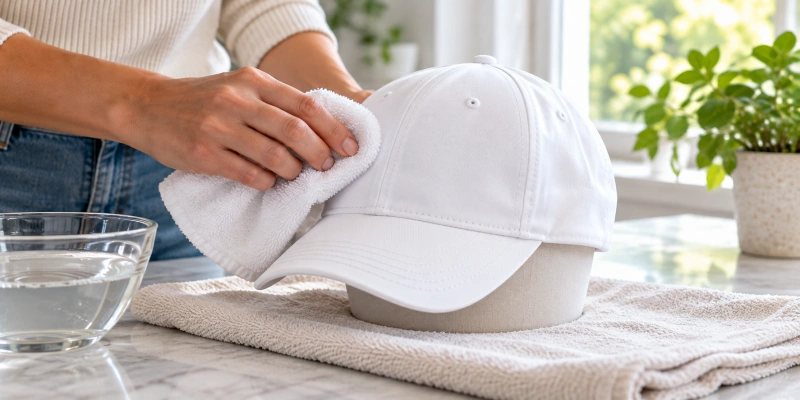
Use a second cloth lightly dampened with clean water to lift remaining cleaner from the treated fabric. Repeated gentle blotting is preferable to leaving a concentrated product at the edge of a wet patch. Do not flood an unknown insert while chasing a faint ring. Press a clean, dry towel against the area; avoid wringing, flattening a supported front, or sharply bending the brim.
Return the crown and brim to their intended shape and leave the cap in a ventilated place to air dry, supported with a clean, colorfast object if needed. Keep it away from concentrated heat unless the care label explicitly permits another drying method. Check the sweatband and inner front as well as the white exterior before storage. Residual moisture or cleaner can leave the cap feeling stiff or produce a new visible edge once it dries.
How to Treat Yellow Stains on a White Baseball Cap?
Yellowing near the front edge may be associated with sweat and body oils, but a yellow area can also involve dye, a finish, or aged materials. Its color alone cannot identify the cause. Start with the label, a hidden-area test, and a gentle treatment of the affected white fabric or sweatband. Remove cleaner carefully and judge the result after complete drying; wet fabric can make a remaining stain look different.
If the first pass helps, a further gentle pass may be possible after the cap dries, provided there is no dye transfer or material change. If it does not help, stop before switching to a stronger product. Deep discoloration or an aged component may not return to pure white. A harsh treatment can damage the logo or the cap even when the stain itself remains.
When the main problem is sweatband buildup, salt rings, or set-in sweat marks rather than general white-fabric cleaning, see how to remove sweat stains from baseball caps. That guide keeps the treatment centered on the sweat-stained area.
Can You Use Bleach on a White Baseball Cap?
Do not infer bleach safety from a white shell. Only consider a bleach product when the finished cap’s care information explicitly permits that specific kind of treatment and every component that it would contact is compatible.
Colored stitching, printed logos, sweatbands, patches, bonding, coatings, and a hidden brim insert can respond differently from the white outer fabric. A hidden-area test reduces one uncertainty but cannot validate an untested full-cap bleaching process.
If the label does not establish bleach compatibility, use the less aggressive approach above or ask a qualified cleaner. Do not substitute a recipe from a plain white garment for a decorated cap, and never mix bleach with other household cleaning products. There is no evidence here to specify a concentration, soaking time, or whitening result for HENGXING caps.
Protect Colored Embroidery, Patches and Logos
A colored design on a white background deserves its own check. Raised embroidery can snag or flatten under a brush; blot around the stitches instead of scrubbing across their loops. Watch the back of the embroidery and any nearby seam for color movement.
With a sewn patch, avoid pulling at its edge. With a bonded patch or heat transfer, keep wet contact limited because the attachment and printed surface may have different care limits from the fabric.
Leather or imitation leather details can mark or stiffen after ordinary wet cleaning. Metal components can retain moisture at attachment points. If a cap combines several materials, use the most restrictive relevant care direction. Do not test a cleaner on the white shell and then assume that the same method is suitable for the colored logo, label, or patch.
Spot Clean or Wash the Whole Cap?
A small mark on a white baseball cap may need only controlled spot cleaning. An all-over dirty cap may call for broader cleaning, but the label and complete construction decide whether that is appropriate. If an allowed full wash is needed, keep colored details, the sweatband, and the brim in mind; a clean white shell is not a successful outcome if the crown loses shape or the logo bleeds.
For the full-cap procedure and the separate question of machine or dishwasher use, read how to wash a baseball cap. This white-cap guide focuses on visible stains, yellowing, whitening risk, and contrast between the shell and colored decoration.
When a White Cap May Not Return to Pure White?
Some yellow areas are more than removable surface soil. An older finish may have changed color, a dye may have migrated, or a mark may have reached layers that a safe spot treatment cannot access. If the cap is already worn, cracked, or fragile, a stronger cleaner may worsen the appearance. Compare the dry result with the surrounding fabric rather than treating the wet color as proof of success.
Stop when a test shows color transfer, a water mark spreads, a patch lifts, or repeated gentle treatment does not improve. For a sentimental or expensive cap, consult a specialist familiar with its construction before trying another method. No cleaner can be promised to restore every aged white cap to a like-new color.
FAQs
How Do You Clean a Dirty White Baseball Cap?
Remove loose dirt dry, check the finished cap’s instructions, and test a compatible mild cleaner in a hidden area. Treat visible marks with a soft cloth, lift the cleaner with a second lightly dampened cloth, then blot and air dry. Broaden the wet cleaning only when the whole cap, including its brim and decoration, allows it.
What Is the Best Way to Wash a White Baseball Cap?
The best method is the least forceful one that removes the soil while following the finished cap’s care instructions. Spot cleaning may be enough for one mark; a fuller wash may be suitable for a cap whose complete construction permits it. See how to wash a baseball cap for the general method. Do not assume a machine is suitable because the shell is white.
How Do You Clean a White Cap With Sweat Stains?
Begin at the affected sweatband, check the care instructions, test a hidden area, and work gently with a compatible cleaner if water alone is insufficient. Remove residue and let the inside dry before reassessing the yellow mark. For persistent sweatband stains or salt rings, use the dedicated guide on how to remove sweat stains from baseball caps.